Fiberglass is a popular material used in many industries such as automotive, marine, and aerospace due to its strength and durability.
However, creating fiberglass parts typically requires a mold, which can be time-consuming and expensive to produce. Fortunately, there is a way on How to Make Fiberglass Parts Without a Mold, and it is a cost-effective and efficient method.
The process of making fiberglass parts without a mold involves creating a positive model of the desired part using foam or other materials. The positive model is then coated with a release agent to prevent the fiberglass from sticking to it.
Next, layers of fiberglass cloth and resin are applied to the positive model, building up the thickness of the part.
Once the fiberglass has cured, the positive model is removed, leaving behind a fiberglass part that is an exact replica of the positive model. This method is commonly known as the “lost foam” or “plug and mold” technique.
By using the lost foam technique, manufacturers can save time and money on creating molds for fiberglass parts. This method is particularly useful for creating one-off or custom parts, as it allows for flexibility in design and production.
However, it is important to note that the lost foam technique may not be suitable for all types of parts, and proper safety precautions should be taken when working with fiberglass and resin.
Fiberglass is a composite material made up of glass fibers and a resin matrix. It is known for its strength, durability, and versatility in manufacturing. Fiberglass parts can be found in a variety of industries, from automotive to marine to aerospace.
The glass fibers in fiberglass are made from various types of glass, including E-glass, S-glass, and C-glass. E-glass is the most commonly used type of glass fiber due to its high strength and affordability.
S-glass is stronger than E-glass but is more expensive. C-glass is resistant to chemicals and is often used in chemical processing equipment.
The resin matrix in fiberglass can be made from a variety of materials, including polyester, vinyl ester, and epoxy. Polyester resin is the most commonly used type of resin due to its low cost and ease of use.
Vinyl ester resin is more expensive than polyester but offers higher strength and chemical resistance. Epoxy resin is the strongest and most expensive type of resin but offers the best strength and chemical resistance.
When making fiberglass parts without a mold, a technique called “lay-up” is used. This involves laying the fiberglass material onto a surface and applying resin to it.
The layers are built up until the desired thickness is achieved. Once the resin has cured, the part can be removed from the surface and trimmed to the desired shape.
Overall, understanding the properties of fiberglass and the various types of materials used in its production is essential for creating high-quality fiberglass parts without a mold.
Necessary Materials and Tools
To make fiberglass parts without a mold, there are some necessary materials and tools that you will need. Here are some of the most important ones:
Materials
Fiberglass cloth: This is the most important material you’ll need. It’s a woven fabric made of glass fibers that are held together with a resin. You can buy it in different weights and weaves, depending on the strength and flexibility you need for your project.
Resin: This is the material that binds the fiberglass cloth together. There are two main types of resin: polyester and epoxy. Polyester resin is cheaper and easier to work with, but it’s not as strong as epoxy resin. Epoxy resin is more expensive and harder to work with, but it’s stronger and more durable.
Catalyst: This is a chemical that you mix with the resin to make it harden. The amount of catalyst you need depends on the temperature and humidity of your workspace.
Release agent: This is a substance that you apply to your mold or surface to prevent the fiberglass from sticking to it. You can use wax, PVA, or a commercial release agent.
Tools
Scissors or a utility knife: You’ll need to cut the fiberglass cloth to the right size and shape for your project.
Mixing cups and stir sticks: You’ll need to mix the resin and catalyst together in precise amounts. Use disposable cups and stir sticks to avoid contaminating your materials.
Paint brushes or rollers: You’ll use these to apply the resin to the fiberglass cloth.
Gloves and safety glasses: Fiberglass can be irritating to the skin and eyes. Wear gloves and safety glasses to protect yourself.
Sandpaper: You’ll need to sand the finished fiberglass part to smooth out any rough edges or imperfections.
Overall, making fiberglass parts without a mold requires some skill and patience, but it’s a great way to create custom parts for your projects. With the right materials and tools, you can create strong, lightweight, and durable parts that will last for years.
Safety Precautions
When working with fiberglass, it’s important to take proper safety precautions to avoid injury or harm. Here are some tips to keep in mind:
Wear protective gear: Always wear protective gear such as gloves, goggles, and a respirator when working with fiberglass. This will protect you from the harmful chemicals and dust that are produced during the process.
Work in a well-ventilated area: Fiberglass produces fumes that can be harmful if inhaled. Make sure you work in a well-ventilated area or use a fan to circulate the air.
Avoid skin contact: Fiberglass can cause skin irritation and itching. Wear long-sleeved shirts and pants to avoid direct contact with your skin. If you do come into contact with fiberglass, wash the affected area with soap and water immediately.
Keep the work area clean: Fiberglass dust can settle on surfaces and pose a health hazard. Keep your work area clean and use a vacuum to remove any dust that accumulates.
Use caution when cutting: When cutting fiberglass, use caution to avoid injury. Wear gloves and use a sharp blade to make clean cuts.
By following these safety precautions, you can ensure that your fiberglass project is completed safely and without incident.
How to Make Fiberglass Parts Without a Mold
Preparation of the Workspace
Before starting to make fiberglass parts without a mold, it is important to prepare the workspace properly. This will ensure that the process goes smoothly and that the final product is of high quality. Here are some steps to follow when preparing the workspace:
Clean the workspace: The first step is to clean the workspace thoroughly. This includes removing any dust, debris, or other contaminants that could affect the quality of the final product. Use a vacuum cleaner or a damp cloth to clean the workspace.
Cover the workspace: Cover the workspace with a plastic sheet or tarp to protect it from the fiberglass resin and other materials. This will also make it easier to clean up afterwards.
Wear protective gear: Wear protective gear such as gloves, goggles, and a respirator to protect yourself from the fiberglass resin and other materials. Fiberglass resin can be harmful if it comes into contact with your skin or eyes, and the fumes can be toxic if inhaled.
Set up tools and materials: Set up all the tools and materials you will need for the project. This includes the fiberglass mat, resin, hardener, mixing containers, brushes, rollers, and any other tools you will need.
Ensure proper ventilation: Make sure that the workspace is well-ventilated. Open windows and doors, or use a fan to circulate the air. This will help to reduce the fumes from the fiberglass resin and other materials.
By following these steps, you can prepare the workspace for making fiberglass parts without a mold. This will help to ensure that the process goes smoothly and that the final product is of high quality.
How to Make Fiberglass Parts Without a Mold
Cutting the Fiberglass Mat
Cutting the fiberglass mat is an important step in making fiberglass parts without a mold. The mat is usually sold in rolls and can be cut to the desired size and shape using scissors, a utility knife, or a rotary cutter.
It is important to wear gloves and eye protection when cutting fiberglass mat to avoid irritation and injury. The mat can be quite tough and difficult to cut, so it is recommended to use a sharp blade and to make multiple passes if necessary.
To ensure accurate and consistent cuts, it is recommended to use a template or pattern to trace the shape onto the mat before cutting. This can be done using paper or cardboard templates, or by drawing directly onto the mat with a marker.
When cutting the mat, it is important to keep the fibers aligned in the same direction to ensure strength and durability. This can be achieved by cutting along the lengthwise or crosswise grain of the mat, depending on the desired strength and flexibility of the finished part.
Overall, cutting fiberglass mat requires patience, precision, and attention to detail. With the right tools and techniques, it is possible to create high-quality fiberglass parts without a mold that are strong, durable, and precise.
Mixing the Resin
Mixing the resin is a crucial step in making fiberglass parts without a mold. It is important to follow the instructions carefully to ensure that the resin sets properly and the final product is strong and durable.
First, wear protective gear such as gloves and a respirator to avoid any health hazards. Then, gather all the necessary materials including the resin, hardener, and any additives such as colorants or fillers.
Measure the resin and hardener according to the instructions provided by the manufacturer. Use a mixing cup or container to ensure accurate measurements. It is important to mix the resin and hardener thoroughly to ensure proper curing.
Stir the mixture slowly and evenly, making sure to scrape the sides and bottom of the container to ensure that all the resin and hardener are mixed together. Avoid mixing too quickly or vigorously, as this can introduce air bubbles into the mixture.
Once the resin and hardener are thoroughly mixed, add any additives and stir again until everything is evenly distributed. The mixture is now ready to be applied to the surface of the part.
Remember to work quickly, as the resin will begin to set within a few minutes. Clean up any spills or drips immediately with a solvent such as acetone.
Following these steps will help ensure that the resin sets properly and the final product is strong and durable.
How to Make Fiberglass Parts Without a Mold
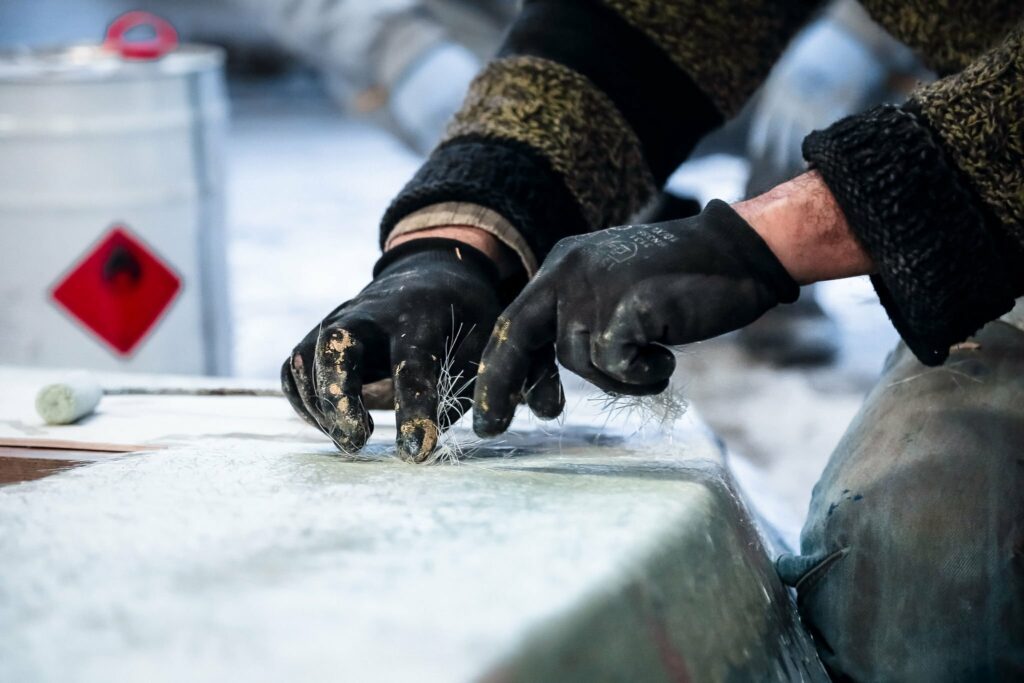
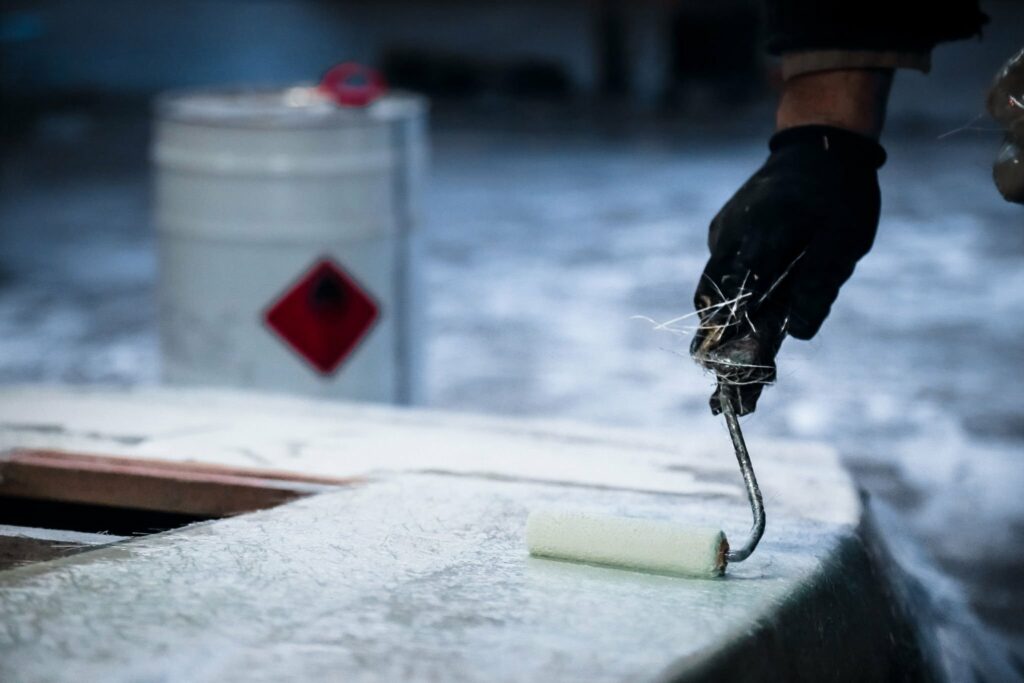
Applying the Resin to the Fiberglass Mat
Once the fiberglass mat has been cut to the desired shape and size, it’s time to apply the resin. This is a crucial step in the process, as it binds the fiberglass together and gives it strength and rigidity.
Before applying the resin, it’s important to make sure that the fiberglass mat is clean and free of any debris or dust. This can be done by wiping it down with a clean, dry cloth.
Next, mix the resin according to the manufacturer’s instructions. It’s important to mix the resin thoroughly, as any unmixed areas can result in weak spots in the final product.
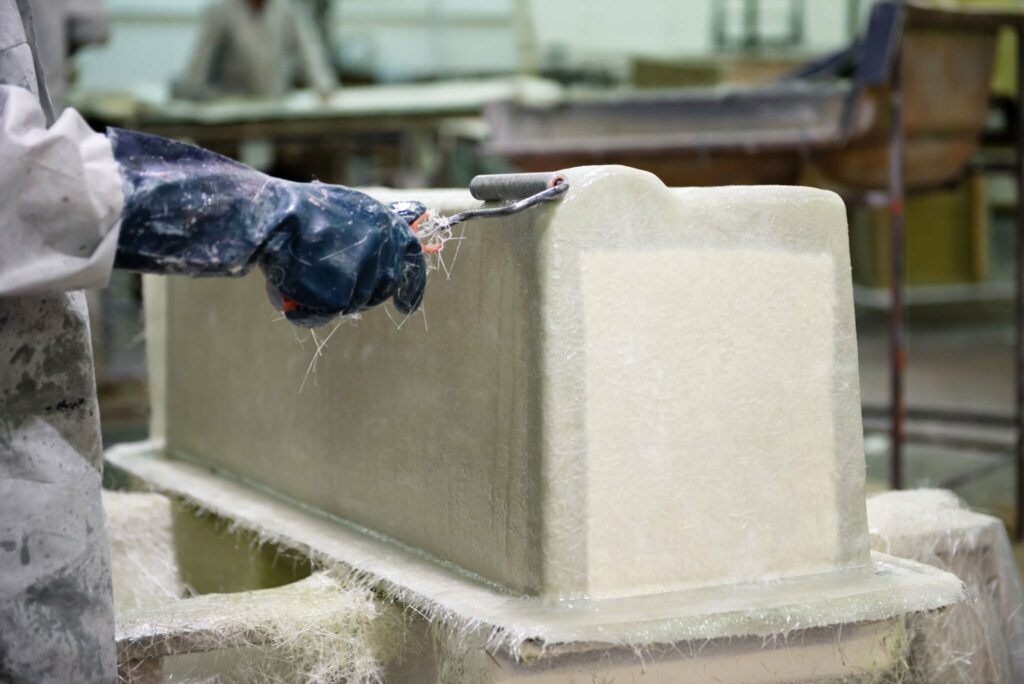
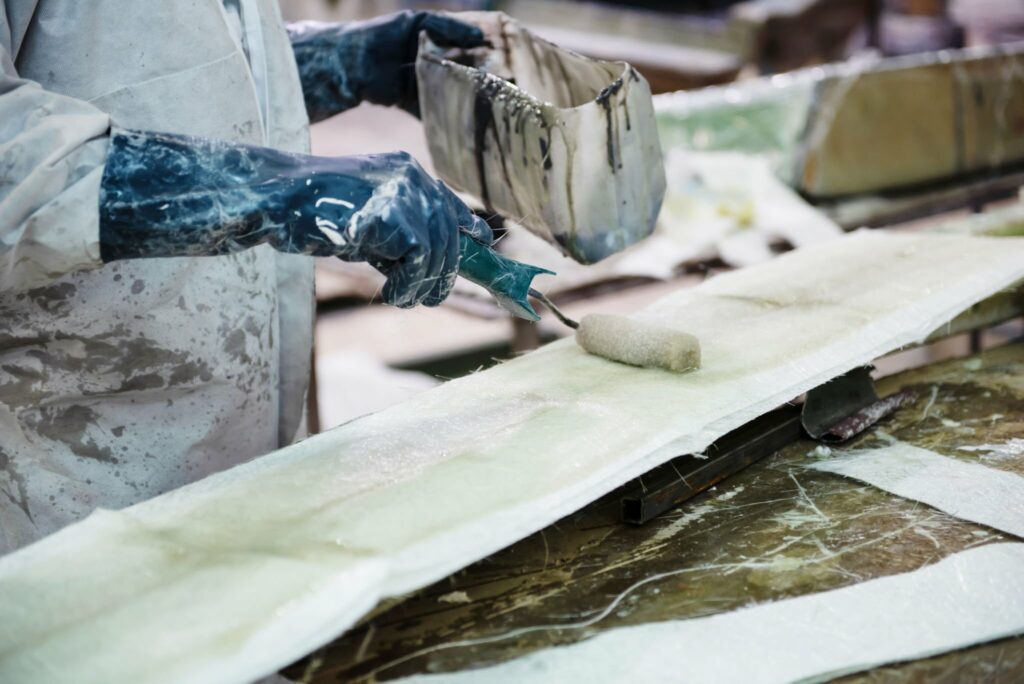
Once the resin is mixed, it can be applied to the fiberglass mat using a brush or roller. It’s important to apply the resin evenly, making sure that all areas of the mat are covered.
As the resin is applied, it will begin to soak into the fiberglass mat. It’s important to keep an eye on the mat to make sure that it doesn’t become too saturated, as this can result in a weak final product.
After the resin has been applied, it will need to cure. The curing time will depend on the type of resin used, as well as the temperature and humidity of the environment. It’s important to follow the manufacturer’s instructions for curing times and conditions.
Overall, applying the resin to the fiberglass mat is a crucial step in the process of making fiberglass parts without a mold. By following the proper techniques and using high-quality materials, it’s possible to create strong, durable parts that can be used in a variety of applications.
Shaping the Fiberglass Part
Once the fiberglass cloth has been laid out and saturated with resin, it is time to shape the part. This can be done using a variety of tools and techniques.
One common method is to use a sanding block or file to shape the part. This allows for precise control over the shape and can be used to create complex curves and contours. It is important to wear a dust mask and eye protection when sanding fiberglass as the dust can be harmful if inhaled.
Another option is to use a rotary tool with a sanding attachment. This can be useful for shaping small or intricate parts. However, it can be difficult to maintain a consistent shape with this method.
A third option is to use a heat gun to soften the resin and then shape the part by hand. This method requires some skill and experience to avoid overheating or distorting the part.
Regardless of the method used, it is important to work slowly and carefully to avoid damaging the part. It may be necessary to make several passes with the shaping tool to achieve the desired shape.
Once the part has been shaped, it should be allowed to cure completely before any further work is done. This will ensure that the part retains its shape and strength.
Curing Process
Once the fiberglass part has been laid up, it needs to be cured. This is the process of hardening the resin so that it forms a solid structure. There are several methods for curing fiberglass, including room temperature curing, heat curing, and UV curing.
Room Temperature Curing
Room temperature curing is the most common method for curing fiberglass. This method involves simply allowing the part to sit at room temperature until the resin has fully cured. The curing time can vary depending on the type of resin used, but typically takes several hours to a day or more.
Heat Curing
Heat curing involves applying heat to the part to speed up the curing process. This method is often used when a faster cure time is desired. Heat can be applied using a heat lamp, oven, or other heating device. It is important to monitor the temperature closely to avoid damaging the part.
UV Curing
UV curing involves using ultraviolet light to cure the resin. This method is often used for small parts or parts with intricate shapes. UV curing is a relatively fast process, taking only a few minutes to cure. However, it requires specialized equipment and can be more expensive than other curing methods.
Regardless of the curing method used, it is important to follow the manufacturer’s instructions for the resin being used. This will ensure that the part cures properly and is structurally sound. Once the part has cured, it can be removed from the mold or form and finished as desired.
Finishing and Polishing
Once the fiberglass part has been constructed, it’s time to finish and polish it. This process will give the part a smooth and shiny surface that is both aesthetically pleasing and functional.
To begin, the surface of the part should be sanded with a fine-grit sandpaper to remove any rough spots or imperfections. A 220-grit sandpaper is recommended for this step. Once the surface is smooth, it can be polished using a rubbing compound.
The rubbing compound should be applied with a soft cloth in a circular motion. This will help to remove any scratches and bring out the shine in the fiberglass. After the rubbing compound has been applied, the part should be wiped down with a clean cloth to remove any excess compound.
To further enhance the shine, a polishing compound can be applied using a clean cloth. The polishing compound should also be applied in a circular motion. Once the polishing compound has been applied, the part should be wiped down with a clean cloth to remove any excess compound.
Finally, a coat of wax can be applied to protect the surface of the part and give it a longer-lasting shine. A high-quality automotive wax is recommended for this step. The wax should be applied with a soft cloth and buffed to a shine.
By following these simple steps, anyone can achieve a professional-looking finish on their fiberglass parts without the need for a mold.
Troubleshooting Common Issues
When making fiberglass parts without a mold, there are some common issues that may arise. Here are some troubleshooting tips to help you resolve these issues quickly and efficiently:
1. Air Bubbles
Air bubbles are a common issue when working with fiberglass. They can occur due to improper mixing of the resin, or when the resin is applied too thickly. To avoid air bubbles, make sure to mix the resin thoroughly and apply it in thin, even layers. If air bubbles do occur, use a needle or toothpick to pop them and then apply a thin layer of resin over the top.
2. Warping
Warping can occur when the fiberglass part is not properly supported during the curing process. To avoid warping, make sure to support the part with a rigid structure, such as a wooden frame or metal rods. You can also use a heat gun to apply heat evenly to the part during the curing process.
3. Cracking
Cracking can occur when the fiberglass part is not properly reinforced. To avoid cracking, make sure to use enough layers of fiberglass cloth and resin. You can also reinforce high-stress areas with additional layers of fiberglass or by using a different type of reinforcement, such as carbon fiber.
4. Rough Surface
A rough surface can occur when the fiberglass part is not properly sanded or finished. To avoid a rough surface, make sure to sand the part thoroughly between each layer of resin. You can also use a finishing compound to achieve a smooth, glossy surface.
By following these troubleshooting tips, you can avoid common issues when making fiberglass parts without a mold. With a little patience and attention to detail, you can create high-quality, custom fiberglass parts for your project.
Conclusion
In conclusion, making fiberglass parts without a mold is a viable option for those who don’t have access to a mold or don’t want to invest in one. By using a few simple tools and materials, anyone can create custom fiberglass parts that are strong and durable.
It’s important to note that this process does require some skill and practice, as well as proper safety precautions. Always wear protective gear such as gloves and a respirator when working with fiberglass, and work in a well-ventilated area.
By following the steps outlined in this article and taking the necessary precautions, anyone can create high-quality fiberglass parts without a mold. Whether you’re building a custom car, boat, or other project, this process can help you achieve the results you’re looking for.