Fiberglass bumpers are a popular choice for many car owners due to their durability and lightweight design. However, over time, these bumpers can become damaged due to accidents or wear and tear.
Fortunately, fixing fiberglass bumpers is a relatively simple process that can be done at home with the right tools and materials.
The first step in fixing a fiberglass bumper is to assess the damage. This can range from minor scratches and cracks to larger holes and dents. Once the damage has been identified, the next step is to gather the necessary materials, which typically include sandpaper, fiberglass resin, and a fiberglass repair kit.
To fix a minor scratch or crack, the damaged area can be sanded down and filled with a small amount of fiberglass resin. For larger holes or dents, a patch of fiberglass mesh can be applied to the damaged area and covered with resin.
After the resin has dried, the repaired area can be sanded down and painted to match the rest of the bumper. With the right tools and materials, fixing a fiberglass bumper can be a straightforward process that can save car owners time and money.

Understanding Fiberglass Bumpers
Fiberglass bumpers are a popular choice for many car owners due to their lightweight and durable nature. However, they can also be prone to cracking, chipping, and fading over time. Understanding the basics of fiberglass bumpers can help you identify and fix any issues that may arise. 2.
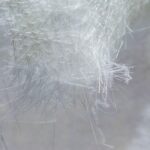
Fiberglass is a type of reinforced plastic that is made up of glass fibers and resin. It is commonly used in the automotive industry to make lightweight and strong body parts, including bumpers. Fiberglass bumpers are often molded to fit specific car models and can be painted to match the color of the car.
One of the main advantages of fiberglass bumpers is their ability to absorb impacts without cracking or denting. However, they are also more prone to cracking and chipping than traditional metal bumpers. This is because fiberglass is more brittle and less flexible than metal.
To repair a fiberglass bumper, it is important to first assess the extent of the damage. Small cracks and chips can often be repaired with a fiberglass repair kit, while larger cracks may require professional help.
It is also important to properly prepare the surface of the bumper before making any repairs, as this can affect the adhesion of the repair materials.
In summary, fiberglass bumpers are a popular choice for car owners due to their lightweight and durable nature. However, they can be prone to cracking and chipping over time. Understanding the basics of fiberglass bumpers can help you identify and fix any issues that may arise.

Identifying the Damage
Before attempting to fix a fiberglass bumper, it’s important to properly identify the extent of the damage. This will help determine the necessary steps for repair and ensure a successful outcome. Here are some common types of damage to look out for:
Cracks and Fractures
Cracks and fractures are the most common types of damage to fiberglass bumpers. They can range from small hairline cracks to large, gaping fractures. It’s important to assess the depth and length of the damage to determine the best course of action.
Holes and Punctures
Holes and punctures can occur from impact or wear and tear. They can be small or large and can affect the structural integrity of the bumper. It’s important to properly fill and reinforce the area to prevent further damage.
Scuffs and Scratches
Scuffs and scratches are cosmetic damage that can be easily fixed with a touch-up paint or filler. However, if they are deep or affect the underlying layers of the bumper, they may require more extensive repair.
Warping and Distortion
Warping and distortion can occur from extreme heat or pressure. This type of damage can affect the shape and fit of the bumper and may require professional repair.
By properly identifying the type and extent of damage, you can determine the best course of action for repairing your fiberglass bumper.

Gathering Necessary Tools
Before beginning the process of fixing a fiberglass bumper, it is important to gather all necessary tools. This will ensure that the job can be completed efficiently and effectively.
The following table lists the tools required for fixing a fiberglass bumper:
| Tool | Description |
|---|---|
| Fiberglass Repair Kit | A kit that contains resin, hardener, and fiberglass cloth |
| Sandpaper | Used for smoothing the surface of the bumper |
| Masking Tape | Used to protect the surrounding area from damage |
| Razor Blade | Used to cut the fiberglass cloth |
| Mixing Cup | Used to mix the resin and hardener |
| Stirring Stick | Used to stir the resin and hardener mixture |
| Paintbrush | Used to apply the resin and hardener mixture |
| Safety Glasses | Used to protect the eyes |
It is important to wear safety glasses while working with fiberglass, as the fibers can irritate the eyes. Additionally, it is recommended to work in a well-ventilated area to avoid inhaling any fumes from the resin and hardener mixture.
Once all necessary tools have been gathered, the next step is to prepare the surface of the bumper for repair. This will be covered in the next section.

Preparation Before Fixing
Before fixing a fiberglass bumper, it is important to properly prepare the area to ensure a successful repair. Here are some key steps to take before beginning the repair process:
- Clean the damaged area: Use a mild soap and water to clean the damaged area and remove any dirt or debris. Be sure to dry the area thoroughly before moving on to the next step.
- Sand the damaged area: Use a fine-grit sandpaper to sand the damaged area. This will help to remove any loose or damaged fiberglass and create a rough surface for the repair material to adhere to. Be sure to sand beyond the damaged area to create a smooth transition between the repaired area and the surrounding bumper.
- Mask off the surrounding area: Use masking tape and paper to mask off the surrounding area to protect it from the repair material. This will also help to create a clean edge for the repair.
- Apply a release agent: Apply a release agent to the damaged area and the surrounding masking tape. This will help to prevent the repair material from sticking to the tape and make it easier to remove the tape after the repair is complete.
By taking these steps to prepare the damaged area, you can ensure that the repair material will adhere properly and create a seamless repair.

Fixing Minor Damages
If the fiberglass bumper has minor damages, it can be fixed easily. Here are the steps to follow:
Cleaning the Area
Before starting the repair, the damaged area should be cleaned properly. Use a degreaser and a clean cloth to remove any dirt or grease from the area. Make sure the area is completely dry before proceeding to the next step.
Applying Fiberglass Filler
Once the area is clean and dry, apply a fiberglass filler over the damaged area. Use a plastic spreader to apply the filler evenly. Make sure to apply enough filler to cover the entire damaged area. Allow the filler to dry completely before proceeding to the next step.
Sanding and Polishing
After the filler has dried, use sandpaper to sand the area until it is smooth and level. Start with a coarse grit sandpaper and gradually move to a finer grit sandpaper. Once the area is smooth, use a polishing compound to restore the shine to the bumper.
By following these steps, minor damages to a fiberglass bumper can be easily fixed.
Fixing Major Damages
Cutting Out the Damaged Area
When dealing with a major damage on a fiberglass bumper, the first step is to cut out the damaged area. This can be done using a rotary tool or a jigsaw. It is important to cut out a clean and precise area, making sure to remove any damaged or cracked fiberglass.
Applying the Fiberglass Mat
Once the damaged area has been removed, the next step is to apply a fiberglass mat. The mat should be cut to size and placed over the damaged area. It is important to make sure that the mat is completely flat and free of any wrinkles or bubbles.
The next step is to apply a fiberglass resin to the mat. The resin should be applied evenly, making sure to completely saturate the mat. It is important to work quickly, as the resin can harden quickly.
Finishing the Repair
After the resin has dried, the repair can be finished. This involves sanding the area to make it smooth and even. It is important to use a fine-grit sandpaper to avoid damaging the surrounding area.
Once the area has been sanded, it can be painted to match the rest of the bumper. It is important to use a high-quality paint and to apply it evenly to achieve a seamless finish.
By following these steps, major damages on a fiberglass bumper can be effectively repaired.
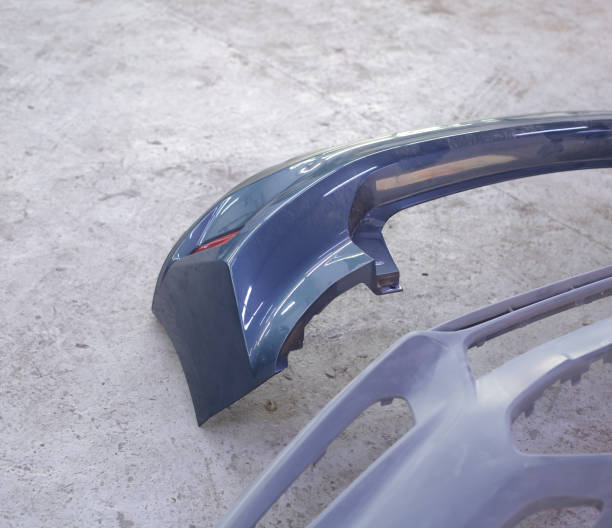
Painting and Finishing
Once the fiberglass bumper has been repaired and sanded, it’s time to paint and finish it. Here are some steps to follow for a professional-looking finish:
- Clean the bumper: Before painting, make sure the bumper is clean and free of dust, dirt, and debris. Use a clean cloth and a mild detergent to wipe down the bumper. Rinse it thoroughly with water and let it dry completely.
- Apply primer: Apply a coat of primer to the bumper to help the paint adhere better. Use a spray can of primer and apply it evenly to the bumper. Let it dry completely before moving on to the next step.
- Apply paint: Choose a paint that matches the color of your car and apply it to the bumper. Use a spray can of paint and apply it evenly to the bumper. Apply several thin coats of paint, allowing each coat to dry completely before applying the next.
- Apply clear coat: Once the paint has dried, apply a clear coat to protect the paint and give it a glossy finish. Use a spray can of clear coat and apply it evenly to the bumper. Apply several thin coats, allowing each coat to dry completely before applying the next.
- Buff and polish: Once the clear coat has dried, use a polishing compound to buff the bumper and remove any imperfections. Apply the compound with a clean cloth and buff the bumper in a circular motion. Once you’ve buffed the entire bumper, wipe it down with a clean cloth.
By following these steps, you can achieve a professional-looking finish on your fiberglass bumper. Just remember to take your time and apply each coat evenly, and your bumper will look as good as new.
Maintaining Your Fiberglass Bumper
To keep your fiberglass bumper in good condition and prevent future damage, it is important to follow some basic maintenance tips. Here are a few things you can do to keep your bumper looking great:
- Wash your bumper regularly: Dirt and grime can build up on your bumper over time, which can cause it to become dull and discolored. To prevent this, wash your bumper regularly with a mild soap and water. Avoid using harsh chemicals or abrasive sponges, as these can scratch or damage the surface of your bumper.
- Wax your bumper: Applying a coat of wax to your bumper can help protect it from the elements and keep it looking shiny and new. Be sure to use a wax that is specifically designed for use on fiberglass surfaces.
- Avoid parking too close to other vehicles: Bumping into another car or object can cause damage to your bumper, so it is best to park in a spot where there is plenty of room on either side.
- Inspect your bumper for damage: Regularly check your bumper for any signs of damage, such as cracks, chips, or scratches. If you notice any damage, have it repaired as soon as possible to prevent further damage from occurring.
By following these simple tips, you can help keep your fiberglass bumper in great condition for years to come.
Common Mistakes to Avoid
Fixing a fiberglass bumper can be a tricky task, and there are a few common mistakes that people often make when attempting to do so. Here are some of the most important ones to avoid:
1. Not Prepping the Surface Properly
Before attempting to repair a fiberglass bumper, it’s essential to clean and prep the surface thoroughly. Failing to do so can result in a poor-quality repair that won’t last. Make sure to remove any dirt, grime, or debris from the surface of the bumper, and sand it down to create a rough surface that will allow the repair material to adhere properly.
2. Using the Wrong Type of Repair Material
There are many different types of repair materials available for fixing fiberglass, and it’s essential to choose the right one for the job. Using the wrong type of material can result in a weak repair that won’t hold up over time. Make sure to choose a repair material that is specifically designed for use on fiberglass, and follow the manufacturer’s instructions carefully.
3. Rushing the Repair Process
Fixing a fiberglass bumper takes time, and rushing the process can result in a shoddy repair. Make sure to take your time and follow the instructions carefully. Rushing the repair can result in a poor-quality finish that won’t last, and may even make the damage worse.
4. Not Allowing the Repair Material to Cure Properly
Once the repair material has been applied to the bumper, it’s essential to allow it to cure properly before using the vehicle. Failing to do so can result in a weak repair that won’t hold up over time.
Make sure to follow the manufacturer’s instructions carefully, and allow the repair material to cure for the recommended amount of time before using the vehicle.
By avoiding these common mistakes, you can ensure that your fiberglass bumper repair is of the highest quality, and will last for years to come.

